Adding Custom Columns in Active Directory Users and Computers
This article describes how to add additional columns in Active Directory Users and Computers console as the current list of available columns is limited to a basic few ones. This comes especially handy where the schema is extended and many of the extended attributes are not readily available for selection.
One basic method is to utilize AdsiEdit.msc and another to utilize the LDIFDE command. This guide assumes that Window 2008 R2 is utilized.
Method 1 - AdsiEdit.msc
1. From the Start menu, run AdsiEdit.msc.
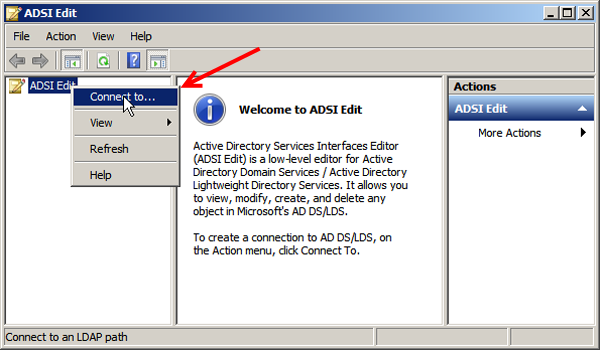
2. Right-click ADSI Edit and click on Connect to…
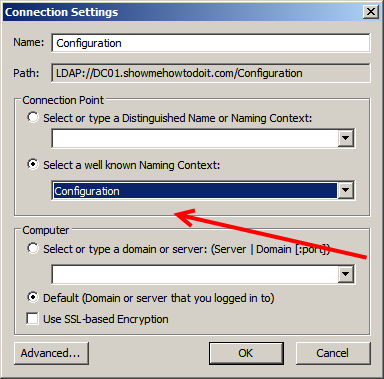
3. In the Select a well known Naming Context drop-down menu, select Configuration and click OK.
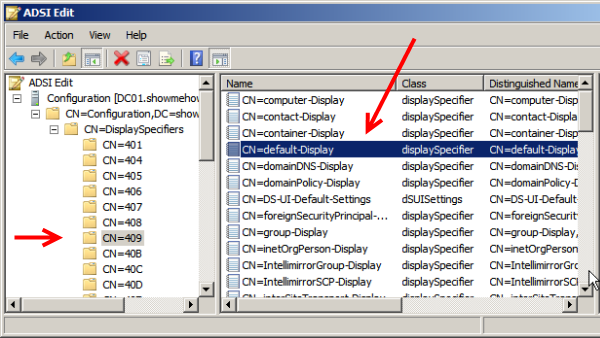
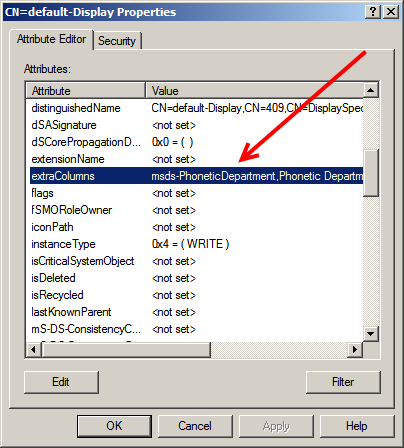
4. Navigate to CN=DisplaySpecifiers, CN=409 and double-click CN=default-Display.
5. Locate the extraColumns attribute and click on Edit.
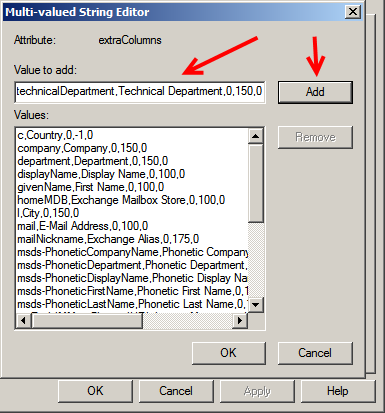
6. In the add field enter the appropriate attribute with the proper format. In our example, we will utilize the following technicalDepartment,Technical Department,0,150,0.
According to article Modifying Existing User Interfaces the format is as follows:
<ldapdisplayname>,<column header>,<default visibility>,<width>,<unused>
In our example, the 150 value is the width that we selected in pixels when viewed in the console.
Click OK and OK to Exit.
Method 2 - Using LDIFDE
** This section is pending **
Displaying the Columns in Active Directory Users and Computers Console
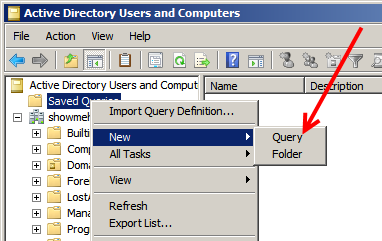
7. Now start Active Directory Users and Computers console, and navigate to Saved Queries and right-click it. Click New, and Query.
8. Enter the following in the Name field “All Users” (this can be anything) and click on Define Query.
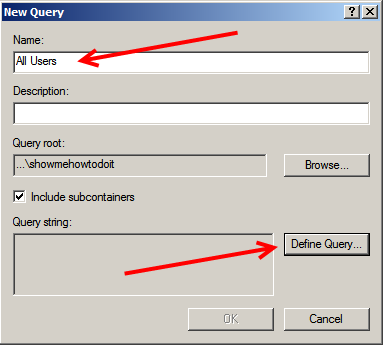
9. In the Name drop-down menu, select Has a value. You can actually customize any query you like, but for simplicity the Has a value is selected.
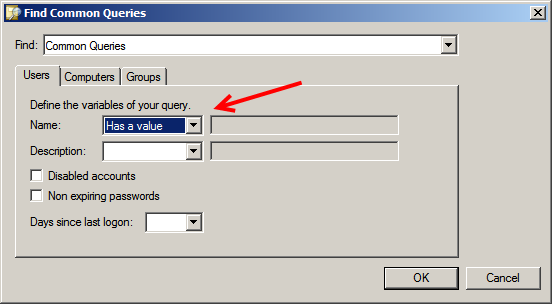
Click OK and OK again. The query will populate some user names depending on your domain.
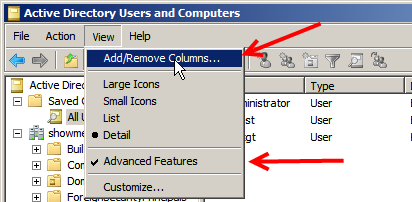
10. With the Saved Query selected, click on Add/Remove Columns… (Also ensure that Advanced Features is selected - can be performed beforehand).
11. On the Available columns, select the desired attribute and click on Add ->. As you noticed, the attribute is listed by the Display Name we defined earlier and not the ldap name which in our case was technicalDepartment.
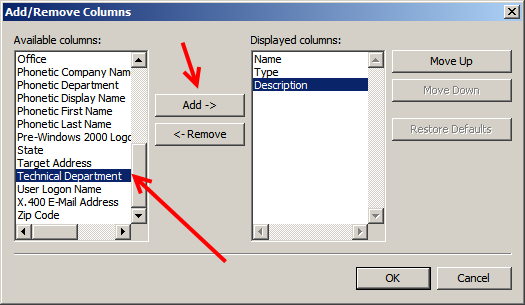
Click OK.
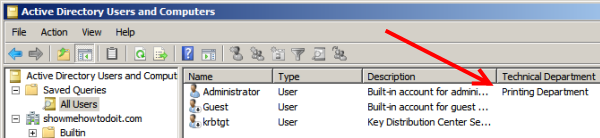
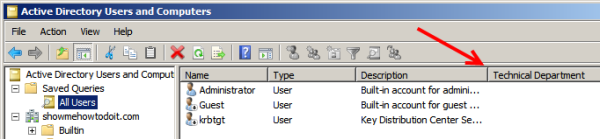
12. As you can now see, the Technical Department column appears now on the console. Also remember that the default width may need to be adjusted depending on your specific attribute.
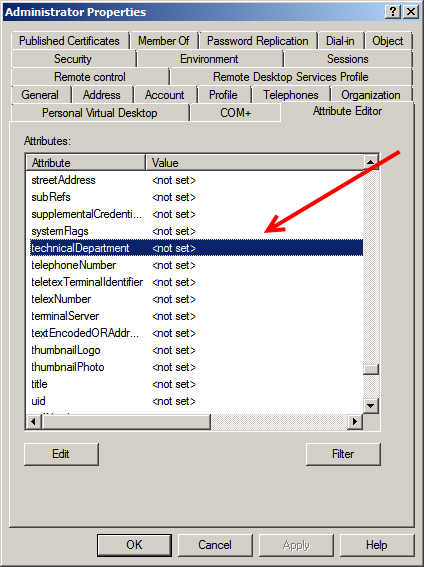
13. Right-click a user, select Properties. Navigate to the Attribute Editor (remember that the Advanced View must be enabled in the console). Locate the specific attribute. In our case it is Technical Department.
14. Now you can double-click the attribute and enter the appropriate information.

15. Once you click OK and navigate back to the Saved Queries, the value entered will be displayed. (A refresh of the console may be required.)